15. Maintenance
BactoSense maintenance refers to the activities and procedures performed to ensure the proper functioning, accuracy and reliability of the instrument over its life cycle.
BactoSense service duty
Adhering to the maintenance schedule is important to ensure a long instrument lifetime, safe operation and correct measurement results. Service duties have to be carried out according to the maintenance schedule and original bNovate spare parts have to be used, otherwise this can lead to damage to the instrument or measurement errors. In case of neglected maintenance, bNovate Technologies accepts no warranty claims made by the customer and is not responsible for any resulting costs. Importantly,
- Only service-trained and authorized personnel are allowed to carry out BactoSense service operation
- Carry out servicing duties according to the servicing schedule in Periodic preventive maintenance by service professional and Overview of maintenance by user.
- When carrying out servicing duties, use original bNovate spare parts. The use of third-party spare parts requires the written approval of bNovate Technologies.
- If the instruments are subjected to heavy use or exposed to adverse environmental conditions, service duties must be carried out more frequently.
Observe the safety points
Before working on the instrument, ensure that you have carefully read the safety points in this user manual. You should also follow these regulations:
- Only professional electricians are authorized to do the electrical installation of the power plug.
- It is forbidden to modify or repair the BactoSense instrument.
- Perform the work steps in the instructed order.
- When replacing parts, use only genuine original parts listed in the consumables and spare parts list.
- When returning components use the original packaging of the BactoSense
- Be sure to use a plug with Protective Earth (PE) and that the device is correctly connected to it.
15.1 Periodic preventive maintenance by service professional
Preventive maintenance of the BactoSense is a scheduled intervention to replace wear parts, update the software and inspect and validate the instrument. Preventive maintenance is important to prevent failures and optimize the performance and reliability. It can only be conducted by service professionals specifically trained by bNovate.
A preventive maintenance is due after the consumption of either 3 cartridges or 1 year, whichever comes first.
Contact bNovate support or your local service partner to see available options. Contact details can be found in Contacting customer service.
15.1.1 Retrieve service information
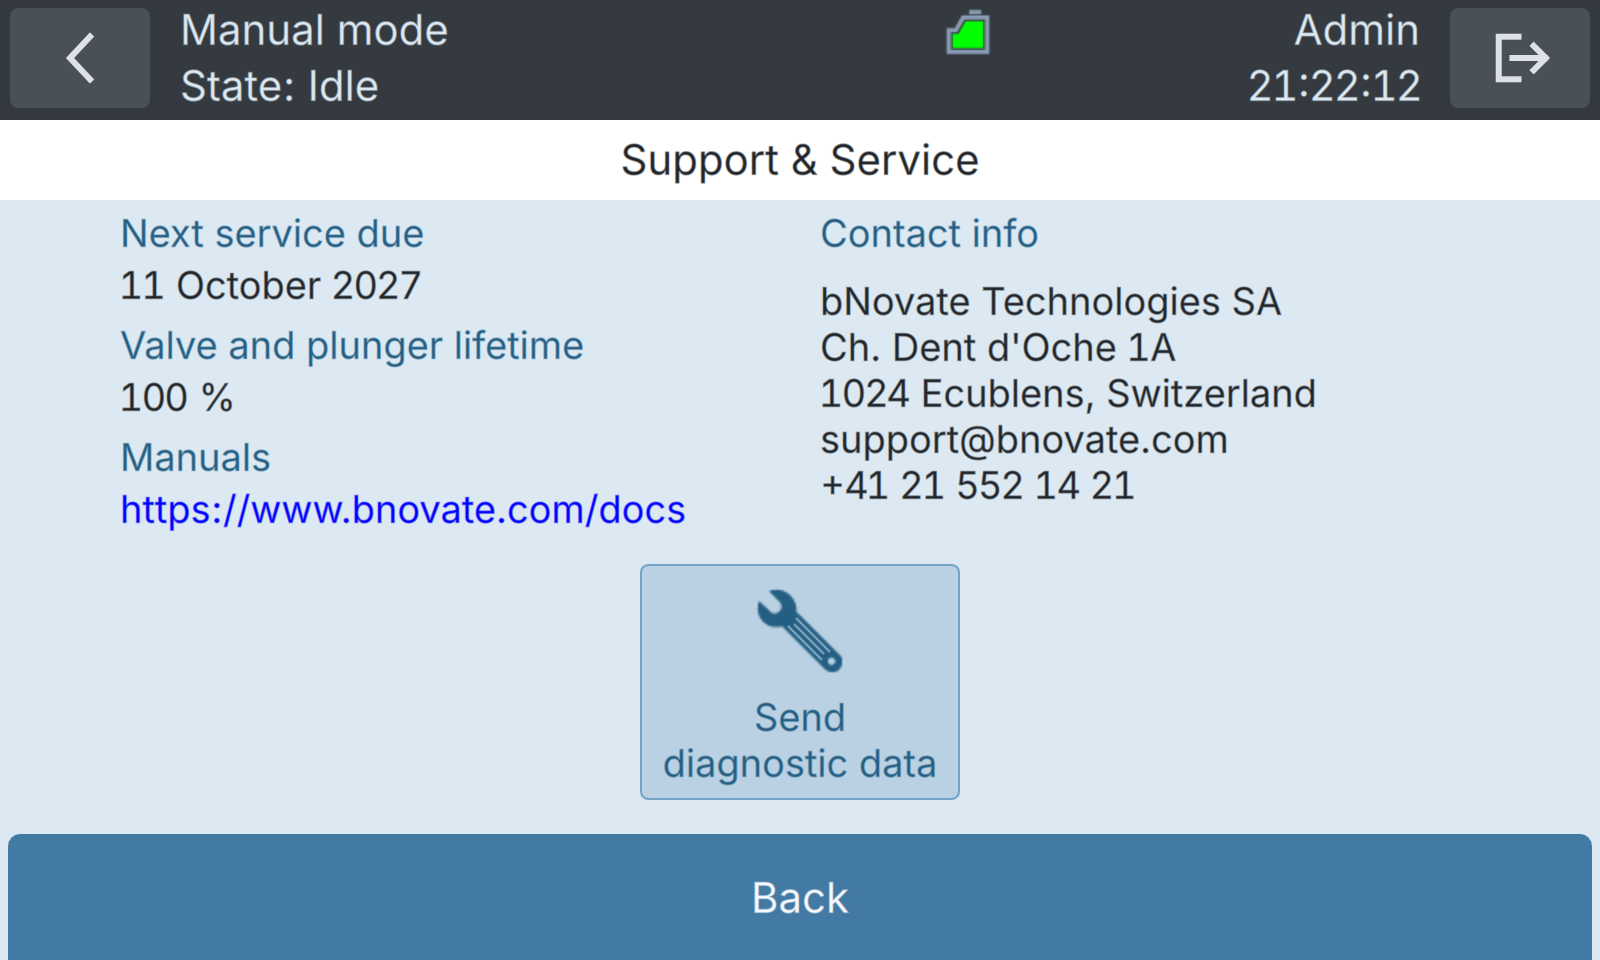
Figure 15-1 Support & Service screen.
| WORK STEP | ADDITIONAL INFO / IMAGE | |
|---|---|---|
| 1. | Log in as an Advanced or Admin user, then navigate to the Home screen. |  |
| 2. | Press the Settings button. |  |
| 3. | Press the Support & Service button. |  |
| 4. | If a service is needed, a warning will be attached to the measurement result. Schedule a preventive maintenance before the service due date. |
15.1.2 Review the service intervention log
The following procedure describes how to view details of past service interventions.
| WORK STEP | ADDITIONAL INFO / IMAGE | |
|---|---|---|
| 1. | As an Advanced or Admin user, press Settings on the Home screen to open the settings menu. | |
| 2. | Press the Maintenance button. |  |
| 3. | Press the Intervention log button. |  |
| 4. | Past service interventions are listed in this log screen. |
15.2 Maintenance by the user
Maintenance by user refers to simple and occasional maintenance activities performed by the user. They are important to maximize the instrument's performance, minimize downtime, and extend its operational life.
15.2.1 Overview of maintenance by user
Table 15-1 Overview of the maintenance activities performed by the user
| WHEN | WHAT | PROCEDURE |
| Cartridge expired or empty | Replace cartridge | See cartridge exchange procedure in Change cartridges. See cartridge shipping instructions in Returning a cartridge for refill. |
| Manual sampling device is newly installed. Instrument has been or will be idle or switched off for more than 3 days. | Cleaning with Washstation or Basic Cleaning | If Washstation is available, see Clean manual sampling device with Washstation. Otherwise see Clean manual sampling device with basic cleaning. |
| Instrument shows signs of contamination | Decontamination | Requires a Cleaning Kit, see consumables list in Consumables. See Cleaning Kit user manual. |
| Online sampling device is contaminated. | Cleaning | See cleaning procedure in Clean online sampling device. |
| Online sampling device tubing is damaged or dirty | Replace tubing | See replacement process in Replacing online sampling device tubings. |
| Cell concentrations lower than expected or no cells measured | Sampling device inlet filter clogged. Replace the filter. | See Replacement of the sampling device filter. See consumables list in Consumables. |
| Error E08 appears (internal humidity) | Internal humidity is not within specified limits. Replace the desiccant bag | Replace the desiccant bag. See instructions in Replacement of the desiccant bag. See consumables list in Consumables. |
| Error E07 appears (disk full) | Disk space is full. Clear disk space | See instructions in Clearing of disk space. |
15.2.2 Clean manual sampling device with Washstation
This protocol describes how to clean the manual sampling device using the Washstation. If no Washstation is available, follow the procedure in Clean manual sampling device with basic cleaning.
- This protocol automatically cleans the inner and outer surfaces of the aspiration needle.
- All reagents required come directly from the installed cartridge.
- The protocol takes approximately 15 min.
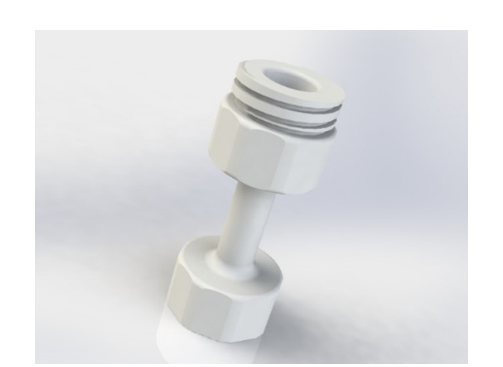
Figure 15-2 Washstation for cleaning the manual sampling device
| WORK STEP | ADDITIONAL INFO / IMAGES | |
|---|---|---|
| 1. | Make sure the manual sampling device is tightly installed as described in Installation of the manual sampling device. | |
| 2. | Navigate to the Home screen of the BactoSense user interface. | |
| 3. | On the Home screen, press Mode and select Manual mode. Press Back, then Measure to open the measurement wizard. | |
| 4. | Select Clean Sampling Device with Washstation from the list of available protocols. | |
| 5. | Make sure 1 replication is configured in the Replications column. | More replications can be conducted for stronger cleanings. |
| 6. | Press the Next button. | |
| 7. | Mount the Washstation by screwing it on the manual sampling device, similar to a sample tube. Make sure you install it to the end of the thread. | |
| 8. | Press the Start button and wait for 15 min for the protocol to complete. | |
| 9. | If the instrument will be idle or decommissioned, leave the Washstation attached to the manual sampling device. If you want to keep on measuring, remove the Washstation and close it with a cap from a 5 mL screw-cap tube. | |
| 10. | If the contamination persists, repeat the procedure with more replications. If it still persists, use the Cleaning Kit to decontaminate the instrument (see Consumables). |
15.2.3 Clean manual sampling device with basic cleaning
This protocol describes how to clean the manual sampling device without the Washstation. If a Washstation is available, follow the procedure in Clean manual sampling device with Washstation instead. This protocol requires sterile water.
| WORK STEP | ADDITIONAL INFO / IMAGES | |
|---|---|---|
| 1. | Make sure the manual sampling device is tightly installed as described in Installation of the manual sampling device. | |
| 2. | Attach a fresh 5 mL screw-cap tube containing 2 – 5 mL sterile water to the manual sampling device. | |
| 3. | Navigate to the Home screen of the BactoSense user interface. | |
| 4. | On the Home screen, press Mode and select Manual mode. Press Back, then Measure to open the measurement wizard. | |
| 5. | Select Clean Optics from the list of available protocols. | |
| 6. | Make sure 1 replication is configured in the Replications column. | Configure more replications for a stronger cleaning. |
| 7. | Press the Next button. | |
| 8. | Press the Start button and wait for 5 min for the protocol to complete. | |
| 9. | Press New to return to the protocol list, then select Clean Sampling Device. | |
| 10. | Make sure 1 replication is configured in the Replications column. | Configure more replications for a stronger cleaning. |
| 11. | Press the Next button. | |
| 12. | Press the Start button and wait for 5 min for the protocol to complete. | |
| 13. | Once the protocol is finished, remove the 5 mL screw-cap tube and discard it. | |
| 14. | Press the Home icon at the top left of the user interface to return to the Home screen. | |
| 15. | If you want to continue with measurements, perform a Prime prior to the first measurement. The instructions can be found in Performing a Prime. If the instrument will be idle or shut off, attach a fresh sample tube to the manual sampling device. | |
| 16. | If you face a persisting contamination, first repeat the procedure with more replications. If it still persists, use the Cleaning Kit to decontaminate the instrument (see Consumables). |
15.2.4 Clean online sampling device
The following procedure helps clearing biological contaminations of the online sampling device. In case of persistent biological contaminations or suspected non-biological contaminations, change the online sampling device tubings as described in Replacing online sampling device tubings and contact support@bnovate.com for assistance.
| WORK STEP | ADDITIONAL INFO / IMAGES | |
|---|---|---|
| 1. | Make sure the online sampling device is correctly installed and water flow conditions are fulfilled (see Installing the online sampling device at the BactoSense). | Important: Make sure the outlet tubing is connected to a drain, as cleaning liquid is released into the online sampling device. |
| 2. | On the Home screen, press Mode and select Manual mode. Press Back, then Measure to open the measurement wizard. | |
| 3. | Select the Clean Sampling Device protocol and configure 5 replications. | |
| 4. | Press Next and Start to launch the cleaning. | |
| 5. | After finishing, press New to return to the protocol list. | |
| 6. | Select the Prime protocol and configure 2 replications. | |
| 7. | Press Next and Start to launch the priming. | |
| 8. | After completion the online sampling device should be clear of minor biological contaminations and you can return to regular operation. In case contaminations persist or if a non- biological contamination is suspected, contact support@bnovate.com for assistance. |
15.2.5 Replacing online sampling device tubings
The inlet- and outlet tubings of the online sampling device must be exchanged if they show signs of damage or contamination. The required materials are the inlet and outlet tubing and two ferrules. For specifications refer to Technical data, and for the part numbers to Consumables.
Never use a spanner on the sampling device when attached to the BactoSense
Wear nitrile gloves when manipulating the sampling device or any other components which come in contact with the sample.
| WORK STEP | ADDITIONAL INFO / IMAGES | |
|---|---|---|
| 1. | Make sure all protocols (e.g. measurements) have terminated, or terminate them if needed. | |
| 2. | Stop the water flow through the sampling device. | |
| 3. | Disconnect the tubings to the water supply and drain them. | |
| 4. | Carefully unscrew the knurled sampling device fixation ring until the sampling device can be removed. | 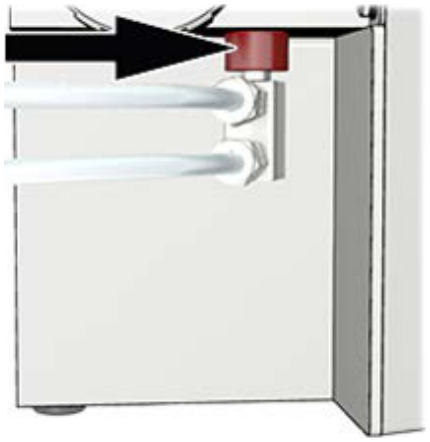 |
| 5. | Make sure the white sealing plug still sits tightly in the connector of the sampling device. If not, it may have remained in the BactoSense sampling device connector. In this case carefully remove it with tweezers and place it back in the sampling device. | 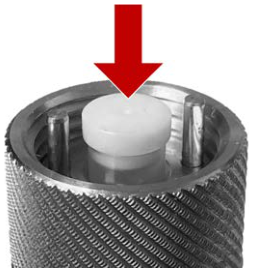 |
| 6. | Unscrew the nuts of the two connectors on the sampling device using a spanner. | 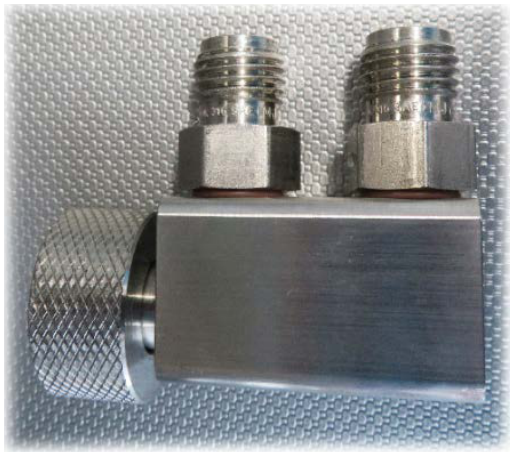 |
| 7. | Pull the nuts off the old tubings. | 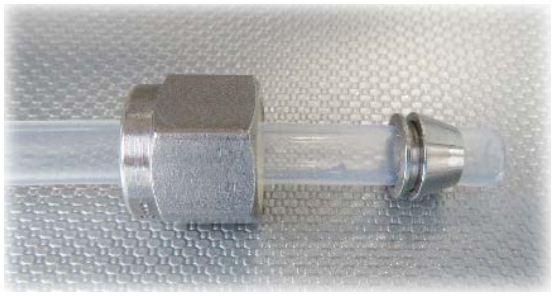 |
| 8. | Discard the old tubings with ferrules. | |
| 9. | Take the new tubings and install the nut and ferrule as illustrated. Screw the nut on the online sampling device using a clamp. Make sure the blue FEP tubing is connected to the top fluidic connector (see figure 5-2 in Installation of the online sampling device). | 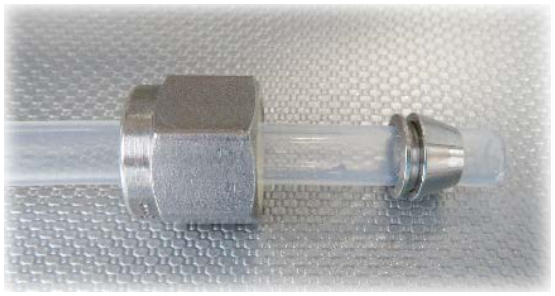 |
| 10. | Continue with the procedure for installing the online sampling device described in Installing the online sampling device at the BactoSense. |
15.2.6 Replacement of the desiccant bag
The following procedure describes how to replace the desiccant bag. The desiccant bag is a consumable listed in Consumables.
| WORK STEP | ADDITIONAL INFO / IMAGE | |
|---|---|---|
| 1. | Open the desiccant bag container by unscrewing the large cap on the left-hand side of the instrument. | 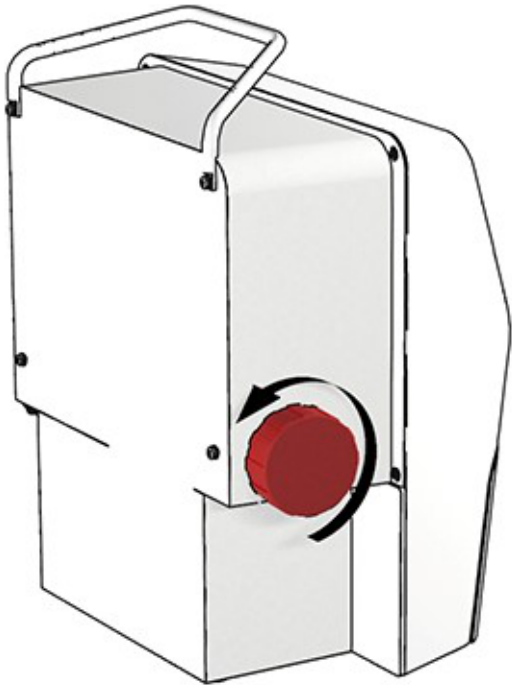 |
| 2. | Replace the used desiccant bag by a new one. | |
| 3. | Close the desiccant bag container by screwing back the large cap. |
15.2.7 Replacement of the sampling device filter
The sampling device of the BactoSense contains a 25 μm filter which can be replaced by the user. The filter is a consumable listed in Consumables.
Wear fresh, non-powdered nitrile gloves when handling the samples, sampling device, or any components which come in contact with them.
| WORK STEP | ADDITIONAL INFO / IMAGE | |
|---|---|---|
| 1. | Unscrew the sampling device from the BactoSense, as described in Removal of the online sampling device for the online sampling device, and Removal of the manual sampling device for the manual sampling device. | |
| 2. | Place flat tweezers under the white plug. | 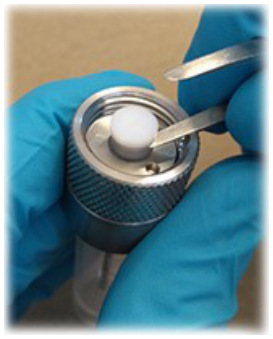 |
| 3. | Remove the white plug and mind the transparent filter disc. The filter sometimes stays inside the cavity and sometimes remains attached to the white plug. | 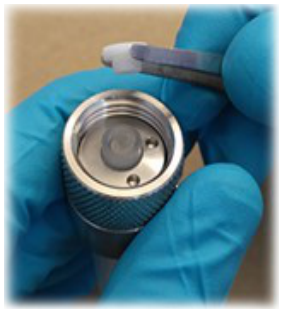 |
| 4. | Remove the filter and place a new one. Do not use force, let the filter sink with gravity. Do not push the filter inside with tweezers. | 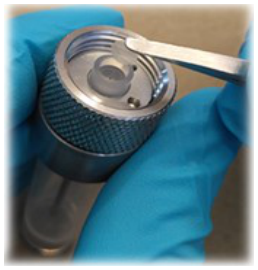 |
| 5. | Re-insert the white plug. Be sure to press it until it reaches the bottom. The force of the white plug will press the filter in the right position. | |
| 6. | Re-install the sampling device as described in Installation of the manual sampling device for the manual sampling device and Installation of the online sampling device for the online sampling device. |
15.2.8 Clearing of disk space
When running out of disk space, old data can be deleted.
Make sure you retrieve all data from other users and your data before deleting it from the BactoSense.
| WORK STEP | |
|---|---|
| 1. | As an Advanced or Admin user, press Settings on the Home screen to open the settings menu. |
| 2. | Press the Maintenance button. |
| 3. | Press Delete old measurements. This function is available to Advanced and Admin users. |
| 4. | If available, choose one of the following measuring modes: Online / Manual |
| 5. | Choose the time interval for the measurements to keep. Measurements older than this will be deleted. |
| 6. | Press Delete measurements, then confirm with Yes, delete to permanently delete the data. |
15.3 Software update
Software updates can either be installed from a USB stick, or from an online repository, if an internet connection is available (e.g. through BactoLink). Software updates must be launched manually from the user interface. For updates using USB stick, contact your service partner. For updates from the online repository, follow the procedure below.
| WORK STEP | |
|---|---|
| 1. | Make sure your instrument has a fast and stable internet connection and you are logged in with Admin permissions. |
| 2. | Recommended: Back up your data, e.g. using export to USB as described in Export data to USB device. |
| 3. | On the Home screen, press Settings to open the settings menu. Press the Maintenance button. |
| 4. | Press System update. Available USB drives and the online repository appear in the list at the top. If no update is shown, press Refresh list. If still no update is shown, no update is available for your instrument or there is an issue with the internet connection. |
| 5. | Select the USB drive or online repository containing the desired update. |
| 6. | Carefully read through the release notes in the Changelog section of the user interface to understand the changes introduced since your current software version. |
| 7. | To update, press Update, confirm with Yes, and follow the instructions. Note: No manual reboot is necessary after the update. |
| 8. | After the update, verify that all instrument configurations are still correct. |
15.4 Embedded manual
The embedded manual lets you consult this user manual directly on the BactoSense touchscreen. Its chapters, tables, safety notices and illustrations are stored on the instrument, so no internet connection is needed to read them.
The manual follows the instrument's interface language. English, German, French, Italian and Spanish are supported. If the selected language is unavailable in the installed manual, the English edition is displayed.
15.4.1 Open the manual
The manual is accessible to Basic, Advanced and Admin users.
| WORK STEP | |
|---|---|
| 1. | Log in and navigate to the Home screen. |
| 2. | Press Settings. |
| 3. | Press Support & Service. |
| 4. | Under Manuals, press User manual to open the chapter contents. |
15.4.2 Read and search
Select a chapter in the contents and scroll to read it. Press a cross-reference in the text to open the corresponding section. Use the reader's toolbar to navigate and adjust the text:
| CONTROL | FUNCTION |
|---|---|
| Contents | Return to the chapter list. |
| Sections | Show the headings in the current chapter. Select a heading to jump to that section, or press Read to return to the article. |
| Search | Enter a word or phrase with the on-screen keyboard and confirm the entry. Select a search result to open its location in the manual. |
| Back | Return to the previous reading position within the manual, for example after following a cross-reference. |
| ‹ / › | Open the previous or next chapter. |
| A− / A+ | Decrease or increase the text size. |
Press an illustration to enlarge it. Use + and − to zoom, drag to inspect details, and press Close to return to the article. Wide tables can be scrolled horizontally.
To leave the manual and return to the instrument screen, press the device's Back control at the top left. External website links display an address to open on a phone or computer.
15.4.3 Contextual help
On screens with contextual help, a circled question mark appears beside the screen title. Press it to open the manual at the relevant instructions. This is useful, for example, when configuring a measurement schedule, interpreting results or changing a cartridge.
Press the device's Back control at the top left to close help and return to the same screen. Your current selections and unsaved entries are retained.
The embedded copy is supplied with the instrument software. To consult the online edition, press Online documentation under Manuals on the Support & Service screen and scan the QR code with a phone. Reading the online edition requires an internet connection on that device.